Friday, 31 October 2014

#Inktober - The Benefits of Participating in an Online Challenge

Inktober is a drawing challenge to make one ink drawing a day for the entire month of October.  Inktober was started in 2009 by an artist called Jake Parker, who set himself the challenge to improve his inking skills and develop positive drawing habits.  This, 2014, is the first year that I have taken part in it and my own motives were similar to Jake’s, they were:

    • to get better at drawing with ink
    • to produce a drawing a day
    • to generate images for my Facebook art page

I am pleased to say that I completed the challenge as this video of my Inktober drawings shows:


So what were the benefits of doing this?  Firstly in my work, I got comfortable drawing with ink, without a pencil sketch as a foundation.  My main discovery is that it’s best to draw what is closest to you first, that which overlaps on your subject rather than starting with the general large shapes as you would when drawing in pencil.  This one touch way of drawing was scary but liberating.  I found it easier than I thought to produce a drawing a day, so much so that I plan on keeping the habit up, but not necessarily using just ink. The challenge also served the purpose of content for my Facebook art page and Twitter and Google + too.  The drawings were often of things I did that day so they became like a journal.

There were benefits to doing Inktober in Social Media rather than just through my blog or website.  I don’t currently have many likes for my art page (just under 150) so these numbers won’t sound impressive but according to Facebook I had at least 50 to 200 people seeing individual drawings.  I’m not sure how many saw them on Twitter and Google +.  I would on average get 6 likes per drawing Facebook, a couple of favourites on Twitter and a couple of +1s on Google +.  The Facebook and Google + likes and +1s tended to be from friends and acquaintances but strangers favourited on Twitter.  Best of all I have been approached to produce some prints of some of the drawings and commissioned to make a drawing in my “Inktober” style.

Some lessons learned are that:

    • Popular drawings were the ones that feature pop culture such Day 11 of my son dressed as Darth Vader and Day 28 of Michael Jackson in Thriller.  

    • Two hash tags (including #inktober) in Twitter would often get retweets and favourites. Tweeting someone specifically generally didn’t.
    • Next time I will embed File Info from Photoshop rather than uploading from my phone and I will include a visible URL back to me as some images have turned up on various blogs and have been shared.

So overall it was a really worthwhile challenge and I will definitely do it again next year.  Next up is Tara Lazar’s PiBoIdMo - Picture Book Idea Month.


Tuesday, 30 September 2014

Creating A Children’s Picture Book Illustration Portfolio - Where to Start? - Part 1

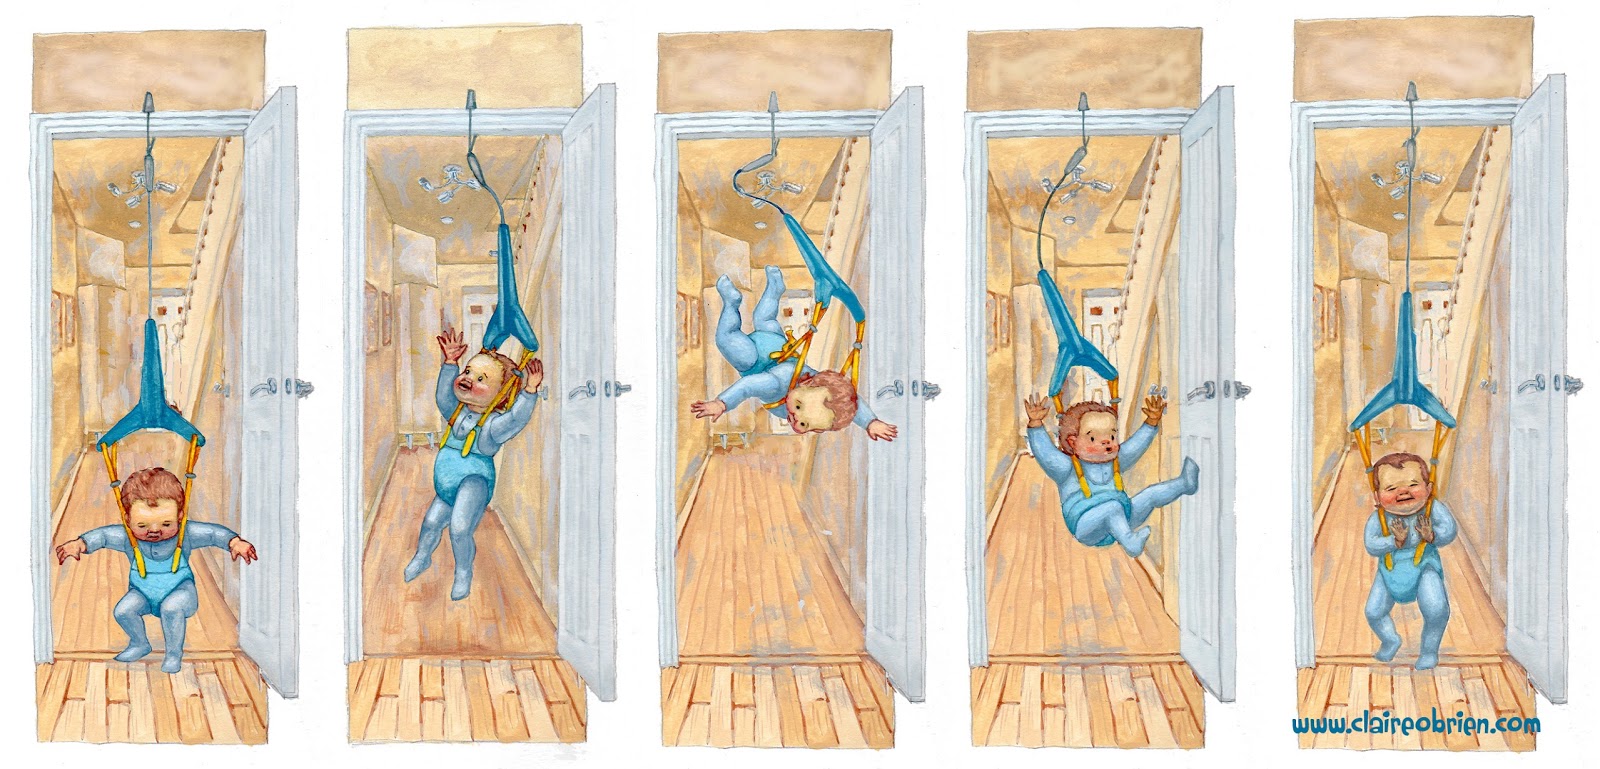
Baby Bouncer Children's Picture Book Art Claire O'Brien

I finished this illustration this week and added it to my portfolio.  I am hesitant to call my portfolio a ‘children’s picture book illustration portfolio’ at this moment in time, not because I am not yet published, but because I don’t think it quite fits the bill.  So how do you create a children’s picture book illustration portfolio?  Where do you start? 

Quantity
Fantasy and Children’s Book illustrator Kiri Østergaard Leonard, has an excellent checklist for illustration graduates:


Number 1 on her list is ‘Build a portfolio of 6 - 12 of your best pieces’.  This gives importance to quantity and quality.  If you have a large quantity of work it suggests that you are more prolific, practised, and perhaps, speedy.  She suggests a higher limit of 12 pieces, any more than that would be tedious for an art director or editor to look through.  Regardless of how many pieces of work are in your portfolio, if it doesn’t contain anything but your highest quality of work then it will be judged on the weakest piece.  Rather than putting in everything that you have ever done in your portfolio put in only your best pieces, 6 at the least.

Quality
How do you know what your best work is?  Ultimately you want to aim for your work to be at industry standard, that is, at the same artistic and technical quality as, or better than, children’s book illustration that is currently being published.  If, like me, you are currently unpublished then your aim should be to make better work than that in your existing portfolio. Try to identify what areas you can fix and improve upon; storytelling, anatomy, perspective, tone, colour, etc?  


In regards to my own portfolio, I need to work on all these areas but most importantly I need to address the image contents, are they fit for purpose?  Could you imagine them in a children’s picture book?  I will address this in my next blog post, so join this blog or follow me on Google + to get notification of when it’s posted.

Saturday, 30 August 2014

Picture Book Anatomy - How a Picture Book is Made Affects How you Write One.

When writing a picture book you need to be aware of their strict formatting which is dictated by how they are made.  Picture books are commonly made up of 32 pages, only it is not as simple as that, you don't have all of those 32 pages to tell your story.

Here is a video that I have made that examines picture book anatomy, its contents are:

00.00 - Introduction
00.19 - Hardcovers
02.50 - Softcovers
03.18 - Signatures, Spreads and Pages
06.07 - Self-ended Hardcover and Softcover Comparison
06.54 - Separate-ended book
07.37 - Conclusions
08.33 - Using this information to write your own picture books


Things I learned making this video are that Hardcovers sometimes have the same amount of pages as softcovers if they are self-ended, but more pages if separate ended.  I learned how to fold and cut a paper signature and how the pages are laid out, out of sequence due to the folds.  And most importantly that a 32 page picture book only has 13 spreads to work with rather than my previously thought 14.

The books featured in this video are:


The links featured in this video are:

My Youtube Channel

Wednesday, 9 July 2014

The I in SCBWI - Illustrators!

Yesterday saw the visit of illustrators and SCBWI members Anne-Marie Perks and Bridget Stevens-Marzo to Seven Stories, The National Centre For Children’s Books.  They were here to hang the SCBWI Showcase exhibition that was launched as part of SCBWI’s annual conference last year.  Me and fellow north-based SCBWI members (Maureen Lynas, Cathy Brumby, Lucy Farfort and Alex Wilson were there to help, support and of course, socialise with them.

In front of part of the exhibition.
Left to right - Maureen Lynas, Alex Wilson, Anne-Marie Perks, Bridget Strevens-Marzo, Cathy Brumby and Me.
Photo by Geoff Lynas

The Illustrator’s Showcase is an annual selection of images by SCBWI member illustrators. This year’s features new faces and veterans such as Mike Brownlow, John Shelley and Gillian McClure (Gillian also has work in the brilliant Picture Book in Progress exhibition).  All SCBWI illustrator members are encouraged to submit, and those that make the shortlist of accepted entries are selected for exhibition by a professional jury panel. 

With twenty three varied works on display, the show is lovely and should be highly visible being in Seven Stories’ cafe.  Works that stand out for me are Heather Kilgour’s City Skyline, a gorgeous, monochrome fantasy cityscape with animals perched atop of the buildings. The hazy, melancholy of Yoko Tanaka’s bear and blanket, who are no longer needed and Alex Wilson’s evocative Rosie’s Rainy Day.

It was great to meet Anne-Marie for the first time, and it was the second time I’ve met Bridget.  Bridget illustrated a great rhyming picture book by Kristy Dempsey called Mini Racer.  It was a favourite of my son’s when he was about one and a half.  He had two favourite spreads, the first was the end paper of all the characters lined up, where he would identify the all the animals and then kiss the cats when he found them.  His other favourite was the spread where the dog falls off his bike, because there is a "DiggerDigger" there.  We often didn't get any further than this as we would have to go back to the end pages and start again.  I’m writing this in the past tense as he eventually destroyed the book, I should’ve got a new copy for Bridget to sign.


I showed Anne-Marie and Bridget my portfolio and latest manuscript and got some useful feedback on them.  Still a lot of work for me to do but I’m on the right track and judging from the standard of this exhibition I’d be honoured to get my own work in the next SCBWI showcase.

Tuesday, 24 June 2014

How to use my Scrivener Picture Book Template - A Free Video Tutorial

I have finally created a video tutorial for my Scrivener Picture Book Template which I released a couple of months ago. I hope that it is useful as it is my first go at demonstrating software on video. If it is please like it in YouTube and subscribe to my channel for more videos coming soon. If anything is unclear I’m happy to answer further questions and any other feedback would be welcome in the comments below, thanks.


Monday, 21 April 2014

Update! - Scrivener Picture Book Template for the PC


In my last blog post I shared with you my Scrivener Picture Book Template and I was pleasantly surprised to see that I had over 200 downloads!  I had some great feedback from the kidlit community, especially the Mac users among them.  It seems the file doesn't always open in a PC for Windows users.

So I've had a look at it and created a new version for Windows that looks closer to how it looks on a Mac.  I've also incorporated a comment from bungld to change the name of the manuscript folder from "Picture Book Template" to "Picture Book Manuscript" in keeping with Scrivener nomenclature.

I also suspect people may have trouble opening a zip file, if so here is a useful video to help you through the process.  Speaking of videos, I am currently working on my own tutorial video on how to use this template which I hope to post soon.  Here are the links to the Windows templates:


Monday, 31 March 2014

Writing a Picture Book in Scrivener - Free Scrivener Template

Isn’t Scrivener just the best writing app in the world?  It is so versatile and reasonably priced.  Many different sorts of writers use it for lots of kinds of work.  Personally, I’ve got the start of a Young Adult (YA) novel on the go, using the standard novel template that comes with Scrivener.  But what I really love to write are children’s picture books. Scrivener doesn’t come with a picture book template and I couldn’t find one online, so I made my own which I’m happy to share with you here on my blog:


The two different versions are formatted for US letter paper and UK A4 paper and while they open on a PC they don't look anything like they do on a Mac. I will produce a PC version soon.  Disclaimer, I’m not a published picture book author and I’m not a Scrivener expert, I’m aiming to be published and I just love using Scrivener and what it can do for me.

So once you've downloaded the zip file, extract and move the .scriv file to your writing folder and when you open it up it should look like this:


On the left, in the Binder window, we see a list of documents either entitled Spread … or Untitled Document.  As most picture book writers know, picture books adhere to a very strict form due to the way they are physically constructed.  The pages are printed, in multiples of eight, onto large sheets of paper, which are called a signatures.  So most modern picture books are told across fourteen double page spreads (each single page is a spread) totalling thirty two pages and the story usually begins on page four or five.  So in my template there are 14 Spread documents which serve, when writing your picture book, as headings to help you plan your page breaks.

The first document in the Binder is the Title Page, I have included this to help with submission to editors and agents. In the Editor window, in the middle, add your name, address, telephone number and email on the top left and the manuscript wordcount on the top right.  Your title of your picture book must be centred and wirtten in capitals, your name should be below that and then your story begins.  The template has centred page numbers in the footer and a right-aligned header of the Scrivener document file name (which you should name as your “surname - title” of your story). The whole template is formatted using SCBWI's recommended 12pt Times New Roman font, double line spacing and 1 inch margins. 

If you wish to write without the Spread headings visible in the manuscript, select only, by Command-Clicking the Untitled Documents in the Binder window as shown below:


The Corkboard view in Scrivener is really useful for plotting your writing, it is switched on by pressing this icon:


In the Binder, Shift-Click select the first Spread document and the last Untitled Document to display the Corkboard as I intend it:


Picture Books have a generally acknowledged plot structure consisting of a beginning, middle and end, three problems to solve, etc., so I have used this structure to create plot prompts that are visible on the Spread index cards in the Corkboard view.  You can then write synopses on the Untitled Document index cards and/or add images.  I have more to add on using the Corkboard which I will put in a video tutorial.  

Well I hope that this is useful to the Scrivener-using, picture book writers out there. Please check back soon for the PC version and a video tutorial on how to use the template.  Any feedback is welcome, especially if I need to fix something.  If it has been useful to you then please comment below, follow my blog, like my Facebook page, share on your own social media channels and send me a tip via Paypal:


Thanks for stopping by and thank you to Marcie Atkins, Michelle Cusolito, Darshana Khiani and Sian Mole for testing the template and the plot prompts can be credited to Rob Sanders.